

How To Create Hp Recovery Partition Windows 10
Z7_3054ICK0KGTE30AQO5O3KA30N0
hp-concentra-wrapper-portlet
![]() Actions
Actions
HP PCs - Performing a System Recovery (Windows 10)
This document is for HP and Compaq computers that came with Windows 10 installed.
Learn how to reinstall or restore an HP computer with Windows 10 to an earlier state. Also, learn how to perform a system recovery using HP Recovery Manager.
For Business computers: The recovery options might no longer be viable as the image might have been replaced. To confirm, contact your company's IT department or your local IT service.
Before you start the system recovery, review the following list:
-
Back up all personal files and read all caution statements before performing a system recovery. Failure to backup your files results in the loss of files and information that you do not want to lose.
-
The complete recovery process can take 4 to 6 hours or more to complete. For best results, the computer should not be connected to the Internet. The computer restarts several times during the process. Do not turn off the power or interrupt the recovery process until the prompt to log in to Windows displays.
-
Following the recovery process, you should take steps to make sure your computer is secure. For more information, see the section Things you should do after performing a recovery in this document.

Issue with HP Recovery Manager
After installing or updating Windows 10, HP Recovery Manager does not work and an error might occur.
Specifically, a Can't open file: X:\sources\Recovery\tools\HP\Rita-tool\ message is displayed if you attempt to open HP Recovery Manager using either of the following methods:
-
Pressing the F11 key, clicking Troubleshoot, and then selecting HP Recovery Manager
OR
-
Searching for and selecting HP Recovery Manager, and then clicking Windows Recovery Environment
To resolve the issue, download and install one of the following HP software updates.
If you are not sure which download is needed for your computer, please return to the top of the page and enter your serial number or product name in the search bar to be directed to the appropriate product page.
note:When you click the link, the file downloads using your Internet browser download capabilities.
Get started
Use the Windows 10 search box to search for HP Recovery Manager and click to open it. Depending on the model of your computer and its configuration, your Recovery Manager screen might vary. Not all options are available on all models and configurations.
If HP Recovery Manager opens and one or both of the following options are the only ones available, you can restore your system with the Microsoft push-button reset.

Standard options for recovery manager display according to the system resources and configuration of your computer system. Yours might vary from the examples in this document.

Types of system recovery
Your computer might have three types of System Recovery available, or it might have only two. Use the recovery type that resolves your issue without making more changes than necessary.
-
System Recovery: This option reformats the system drive (usually C:), reinstalls the original operating system, and reinstalls all the original hardware drivers and software.
warning:
If the size of the OS partition (usually C:) was reduced below a minimum size requirement, other user-created partitions are removed and stored data is destroyed.
-
Factory Reset: Factory Reset reformats the entire hard drive, reinstalls the original operating system, and reinstalls all the original hardware drivers and software. This option also recreates the required Recovery partition (usually D:) and reinstalls the required software. The factory reset recreates the required Recover Partition (usually D:) and all other required partitions.
The Factory Reset option returns all of the computer's software to the condition it was in at the time of purchase. All user changes or additions are removed.
Perform system recovery
To return the computer to a previous state, system recovery to accomplish such things as:
-
Reformat the system drive
-
Reinstall the original operating system
-
Reinstall original hardware drivers and software
To perform a recovery on your computer with Windows 10 using one of the following methods:
-
Recovery when Windows opens correctly
-
Recovery when Windows does not open correctly
-
Recovery using recovery media, such as discs or a USB flash drive
Back up all personal files and read all caution statements before performing a system recovery.
Recover without affecting your files using HP Recovery Manager
You can refresh your computer without affecting your personal files and applications.
If Windows opens correctly, perform the following steps to start a system refresh that does not affect your files.
-
Turn off the computer.
-
Disconnect all connected devices and cables such as personal media drives, USB drives, printers, and faxes. Remove media from internal drives, and remove any recently added internal hardware.
Do not disconnect the monitor, keyboard, mouse, or power cord.
-
Turn on the computer.
-
From the Start screen, type recovery manager, and then select HP Recovery Manager from the search results.
If you are prompted for an Administrator password or confirmation, type the password or provide the confirmation. If a User Account Control window asks if you want to allow the program to make changes to the computer, click Yes.
-
Under Help, click Windows System Reset.

-
Select Keep my files.

-
Wait while the computer gets things ready.

-
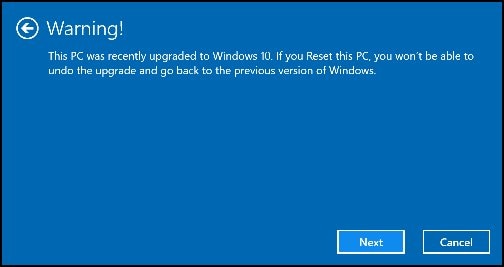
Read Your apps will be removed, and then click Next.

-
If you continue to Reset the PC, you won't be able to undo, or go back, to a previous version of Windows.
-
You are now ready reset, or refresh, the computer.
To proceed, click Reset.

-
Follow any on-screen instructions.
Recovery using HP Recovery Manager
If Windows opens correctly, perform the following steps to start a system recovery from the Windows Start screen.
-
Turn off the computer.
-
Disconnect all connected devices and cables such as Personal Media Drives, USB drives, printers, and faxes. Remove media from internal drives, and remove any recently added internal hardware.
Do not disconnect the monitor, keyboard, mouse, or power cord.
-
Turn on the computer.
-
From the Start screen, type recovery manager, and then select HP Recovery Manager from the search results.
If you are prompted for an Administrator password or confirmation, type the password or provide the confirmation. If a User Account Control window asks if you want to allow the program to make changes to the computer, click Yes.
-
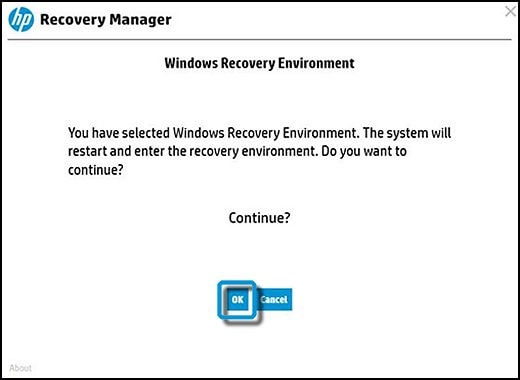
Under Help, click Windows Recovery Environment.

-
Click OK. The system reboots into the Windows Recovery environment.
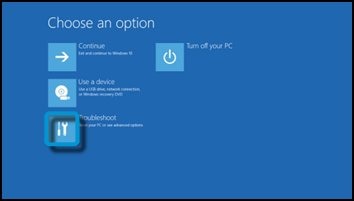
-
Click Troubleshoot.
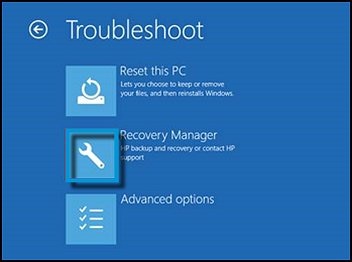
-
Click Recovery Manager.
-
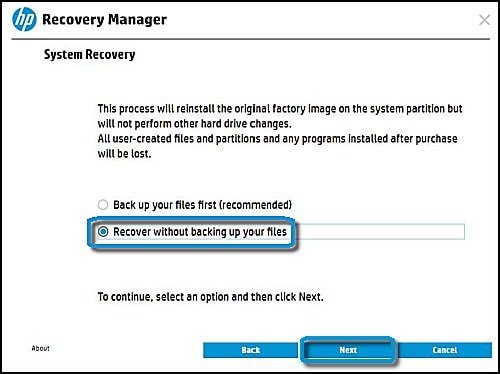
Click Recover without backing up your files, and then click Next.
-
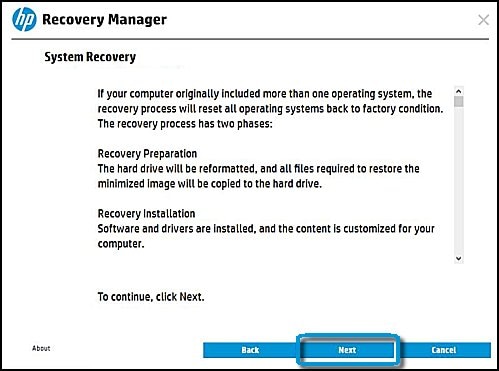
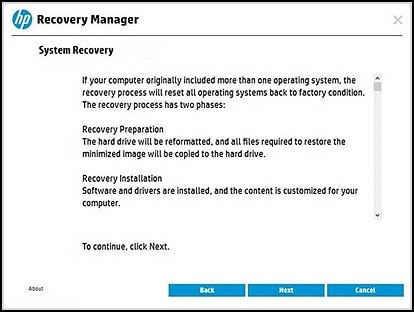
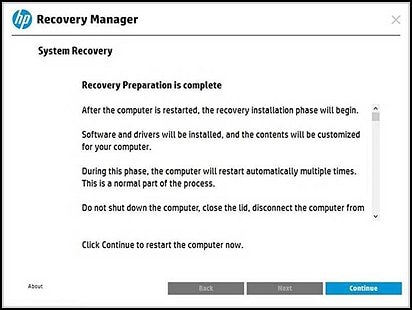
Read the System Recovery information. To proceed, click Next.
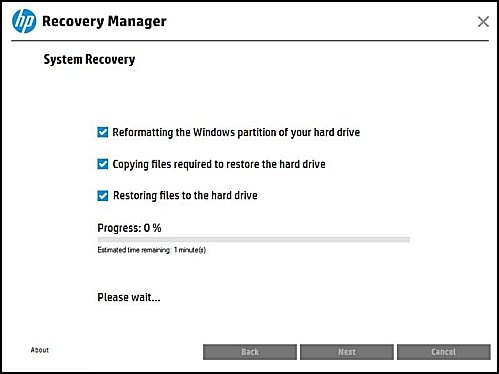
Recovery Manager is preparing the system for recovery.
-
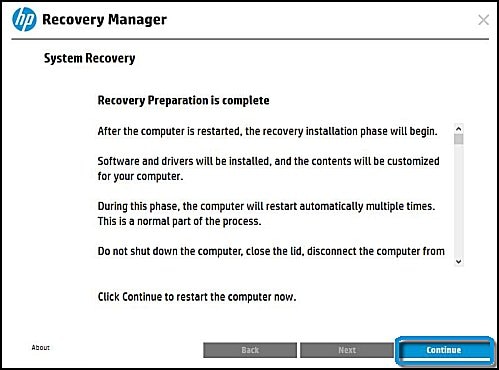
The preparations are complete. Click Continue.
The computer restarts. Follow any on-screen instructions and do not interrupt it during the process. The computer might restart a number of times during the recovery process.
System recovery using HP supplied recovery media
If you received HP recovery media from HP, use this section to recover your computer. Insert the media and use the following instructions.
-
Disconnect all connected devices and cables such as Personal Media Drives, USB drives, printers, and faxes. Remove media from internal drives, and remove any recently added internal hardware.
Do not disconnect the monitor, keyboard, mouse, or power cord.
-
Insert the recovery media (USB Drive, CD/DVD) and then turn off the computer.
-
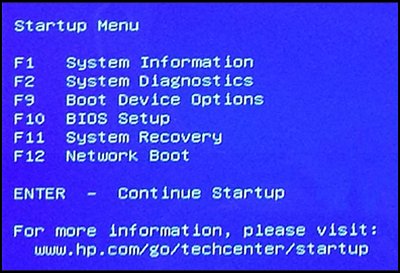
Turn on the computer and immediately press the Esc (escape) key repeatedly, about once every second, until the Startup Menu opens.
-
Notebook

-
Desktop
-
-
Press F9 to open Boot Device Options
menu. -
Use the up or down arrow key to select the CD/DVD drive or USB drive, and then press Enter.
note:
If you are using recovery media supplied by HP, a black window opens asking you to Press any key to boot from the CD or DVD..... This screen only displays for 3-4 seconds and if no key is pressed, the system boots normally into Windows. You must repeat these steps in order to boot from the CD/DVD recovery media.


note:
More than one USB drive or CD/DVD drive selection might be available from the list of bootable devices. If so, select one of the USB drive CD/DVD selections from the list to see if HP Recovery starts. If recovery does not start or a non-system disk error is displayed, restart the computer by pressing the power button, and then repeat these steps to select another USB or CD/DVD drive. When recovery starts, continue using the steps to complete recovery.
-
Select the language.

-
The option should be Factory Reset. Click Next.

-
On the Welcome page, click Next.

-
To recover your system without backing up your files, the files should already be backed up and saved.
To continue, if you have backed up your files, click Recover without backing up your files, otherwise click Back up your files first (recommended).

-
Prepare the computer for recovery.

-
After all files are copied to the hard drive, on the Factory Image preparations screen, you are asked if you have received a Supplemental Recovery Disc.
If you have, insert it now. If not, click Skip.
caution:
If you are using a recovery USB drive supplied by HP, click Skip.

-
When the Recovery preparation is complete window is displayed, perform the next step, depending on your recovery media:
-
If you are using a recovery USB drive: Remove the USB drive, and then click Continue.
note:
If the USB drive is not removed, the recovery process reboots to the first recovery screen and starts over.
-
If you are using a CD/DVD: Click Continue.
-
-
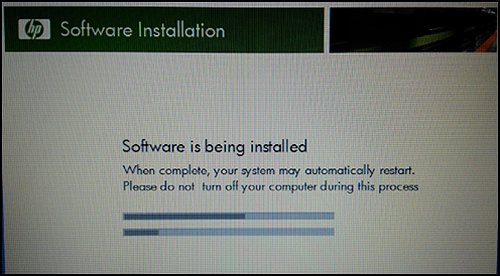
The computer might go through several Software Installation screens; this is normal, please do not turn off your computer during this process.
note:
Do not interrupt the process as the computer restarts multiple times during the recovery and installation process.
-
When setup is complete, do the following:
-
Turn off the computer.
-
Reconnect all devices and cables.
-
Turn on the computer.
Reinstall any software programs that were added after purchasing the computer, as well as any files that were backed up.
-
-
Before using the computer:
-
Protect your computer by reinstalling any virus and security software that was installed before the system recovery.
-
Reinstall any software programs that were added after purchasing the computer.
-
Add back to the computer any files that were backed up.
-
Create recovery media
To create the recovery media now, use the following instructions. Only one set of media can be created, so if it has already been created, you cannot create another one.
-
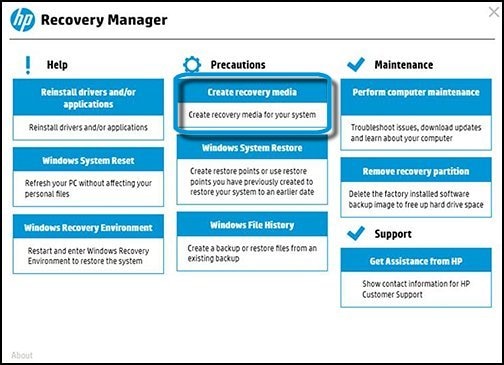
Search for and open HP Recovery Manager.
-
In Recovery Manager, click Create recovery media.
-
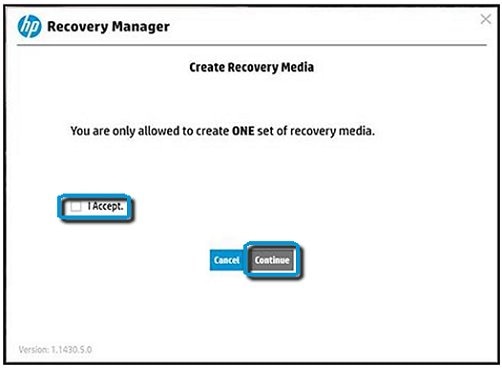
Click I Accept to the notification that only one set of recovery media can be made.
Then click Continue.
-
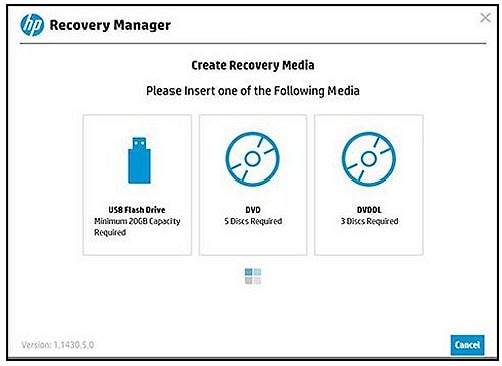
The media detection page opens.
caution:
If you select to create the recovery media in a USB flash drive, the USB flash drive must be able to hold more than the minimum amount of data displayed on the screen; not all the capacity in a USB drive is usable. Example: If the minimum amount of data required shows 16 GB, use an 18 GB drive for better results. If the size of the USB drive is larger than 32 GB, the extra size on the flash drive might not be usable after the recovery media is created. Please be aware that all data on the selected USB flash drive is lost after the recovery media is created.
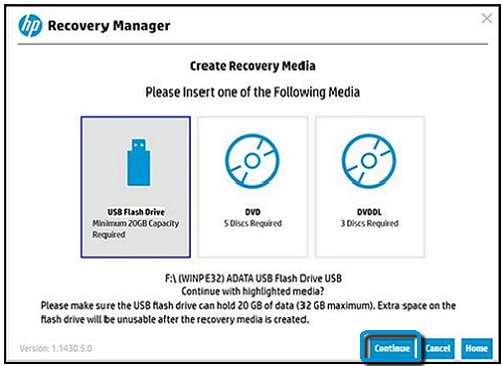
Select whether to create the recovery media on a USB flash drive or CDs and follow the on-screen instructions.
Select whether to create the recovery media on a USB flash drive or CDs and follow the on-screen instructions.
For example: Choosing the USB Flash Drive:
System recovery using media you created
To recover your system with the media you created, use the following instructions.
-
Disconnect all connected devices and cables such as Personal Media Drives, USB drives, printers, and faxes. Remove media from internal drives, and remove any recently added internal hardware.
Do not disconnect the monitor, keyboard, mouse, or power cord
-
Insert the recovery media (USB Drive, CD/DVD) and then turn off the computer.
-
Turn on the computer and immediately press the Esc (escape) key repeatedly, about once every second, until the Startup Menu opens.
-
Notebook
-
Desktop
-
-
Press F9 to open Boot Device Options
menu. -
Use the up or down arrow key to select the CD/DVD drive or USB drive, and then press Enter.
-
Notebook
-
Desktop
note:
More than one USB drive or CD/DVD drive selection might be available from the list of bootable devices. If so, select one of the USB drive CD/DVD options from the list to see if HP Recovery starts. If recovery does not start or a non-system disk error is displayed, restart the computer by pressing the power button, and then repeat these steps to select another USB or CD/DVD drive. When recovery starts, continue using the steps to complete recovery.
If you cannot select the recovery media drive from the Boot Menu, disable Secure Boot and enable Legacy Mode in the BIOS. For detailed instructions, see the Disabling Secure Boot in Windows 10 in this document.
-
-
When prompted to run Recovery Manager from the hard drive or from media, select Run program from media, and then click Next.

HP Recovery manager opens.
-
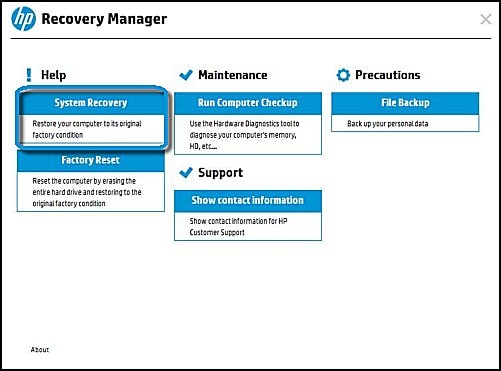
Select System Recovery to erase all the files from the hard drive and restore it to the original factory condition. Then click Next.
caution:
If you have not already backup your files, click file backup and follow the instructions. Proceeding without backing up your files results in lost files and information.
-
Select Recover without backing up your files and then click Next.

-
HP Recovery Manager prepares the computer for recovery.

-
If you are using recovery discs, follow the on-screen instructions by inserting the next disc as prompted. Do not click Cancel.
caution:
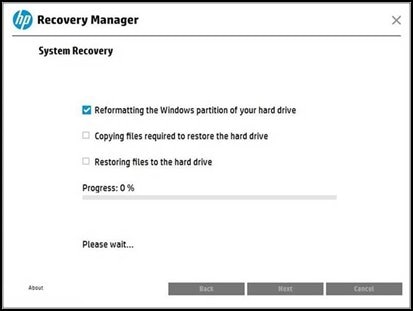
Do not stop the process while the Windows partition is being reformatted and the files to restore the hard drive are being copied.
-
Wait while the files are copied to the hard drive.

-
Click Continue when the recovery preparation is complete.
caution:
Do not interrupt the process as it restarts multiple times during the recovery and installation phase.

-
Do not turn off your computer during this process. The computer might go through several Software Installation screens.
-
When setup is complete, do the following:
-
Turn off the computer.
-
Reconnect all devices and cables.
-
Turn on the computer.
-
-
Before using the computer, update and protect your computer by reinstalling any virus and security software that was installed before the system recovery.
- Reinstall any software programs that were added after purchasing the computer, as well as any files that were backed up.
Disable secure boot
It might be necessary to disable secure boot in the BIOS in order to start the computer using recovery media (USB Drives or CD/DVD). Follow these steps to disable Secure Boot in the BIOS.
note:Use the following procedure only when you cannot select the recovery media from the Boot Option Menu or when you are using an external optical drive. If you are able to boot from the Recovery media or not, it is very important to reverse the changes made in the BIOS, this means you need to load the BIOS default settings. Otherwise this may cause instability in the system when making updates recommended by HP.
Use one of the following methods to open the Computer Setup Utility:
-
Turn on the computer and immediately press the F10 key repeatedly, about once every second, until the Computer Setup Utility opens.
-
Turn on the computer and immediately press the Escape key repeatedly, about once every second, until the Startup menu opens. Then press F10.
Choose menu screens by pressing the left or right arrow keys. Use the up or down arrow keys to move through the list of items on the menu screen. Press the Enter key to select an item and open a submenu. Then use the left and right arrow keys to modify the settings. Press the F10 key to save the changes and exit from a submenu, or press the Esc key to exit from a submenu without saving the changes.
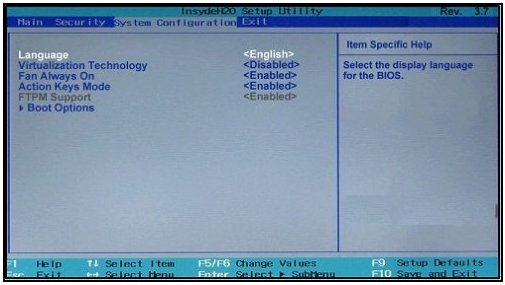
Notebooks
-
Use the right arrow key to choose the System Configuration menu, use the down arrow key to select Boot Options, and then press Enter.
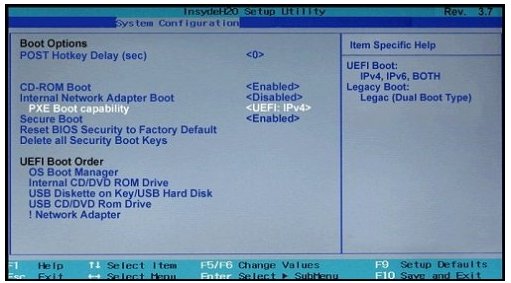
-
Use the down arrow key to select Secure Boot, press Enter, and then use the down arrow key to modify the setting to Disable and press Enter.
-
Use the arrow keys to select Legacy Support and press Enter, and then use the arrow keys to modify the setting to enable and press Enter.
-
Press F10 to accept the changes and exit or use the left arrow key to select the Exit, use the down arrow key to select Exit Saving Changes and then press Enter to select Yes.
-
The Computer Setup Utility closes and the Operating System Boot Mode Change screen displays, prompting you to confirm the Boot Options change. Type the code shown on the screen, and then press Enter to confirm the change.
-
The Computer Setup Utility closes and the computer restarts.
-
Turn the computer off and try to boot from the Recovery media once again.
-
If you are still unable to start from the recovery media, even after disabling secure boot and enabling legacy support, try to perform a recovery using HP Recovery Manager.
Desktops
-
Use the right arrow key to choose the Security menu, then use the down arrow key to select Secure Boot Configuration, and then press Enter.

-
Press F10 when the Secure Boot Configuration window is displayed.

-
Use the down arrow key to select Secure Boot, then press the left or right arrow keys to modify the setting to Disable.
-
Use the up arrow key to select Legacy Support, then press the left or right arrow key to modify the setting to Enable and press F10.
-
Press F10 to accept the changes and exit. Then press Enter or use the left arrow key to select File, use the down arrow key to select Exit Saving Changes, and then press Enter to select Yes.
-
The Computer Setup Utility closes and the Operating System Boot Mode Change screen is displayed, prompting you to confirm the Boot Options change.
Type the code shown on the screen, and then press Enter to confirm the changes.
-
The Computer Setup Utility closes and the computer restarts.
-
Turn the computer off and try to boot from the Recovery media once again.
-
If you are still unable to start from the recovery media, even after disabling secure boot and enabling legacy support, try to perform a recovery using HP Recovery Manager.
Recovery when Windows 10 does not start correctly
If Windows 10 does not open correctly, perform the following steps to recover the computer:
note:If the recovery partition on the hard disk drive is not functioning correctly, this method does not work and an error message displays. If an error message indicates that System Recovery cannot be run from the startup screen, a set of recovery discs or a recovery USB flash drive is needed to perform a system recovery. Follow the instructions listed in one of the following sections, depending on the recovery media available: Recovery using HP supplied recovery media or Factory reset using media you created.
-
Turn off the computer.
-
Disconnect all connected devices and cables such as Personal Media Drives, USB drives, printers, and faxes. Remove media from internal drives, and remove any recently added internal hardware.
Do not disconnect the monitor, keyboard, mouse, or power cord.
-
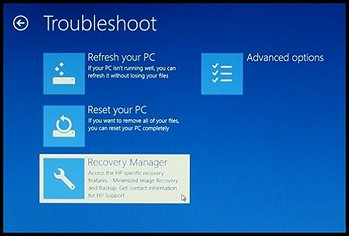
Turn on the computer and repeatedly press the F11 key about once every second until the Choose and option screen is displayed, and then continue.
-
On the Choose an Option screen, click Troubleshoot.
-
On the Troubleshoot screen, click Recovery Manager.
-
Under Help, click System Recovery.

-
When Recovery Manager prompts you to back up your files, select a backup option:
note:
Depending on the version of Windows, the following screens might appear slightly different.
Follow the instructions to backup your files and recover the system.
-
If you have already backed up personal files or you do not want to back up personal files, select Recover without backing up your files, and then click Next. Continue to the next step.
-
If you want to back up your personal files, follow these steps to create a backup.

-
Select Back up your files first (recommended), and then click Next.
-
Select the method you want to use to choose files to back up:
-
If you want to identify the categories of files to back up, select Auto Selection. This option allows you to select the file type to back up instead of selecting the individual files to back up. For example, you can choose to back up all picture files, all document files, and all video files.
or
-
If you want to select individual files to back up, select User Selection, and then click Next.

-
-
Depending on the method you selected, follow one of these steps:
-
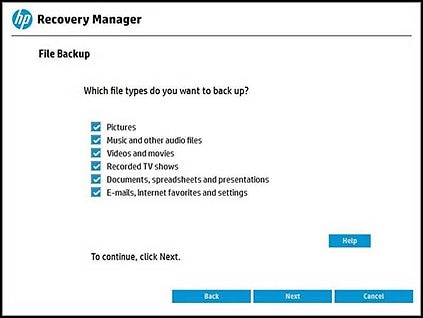
Auto Selection (recommended): Select the file types you want to back up, and then click Next. The File Backup Wizard creates the list of files to back up.
note:
This might take as long as 30 minutes to complete. Do not interrupt the backup process.

-
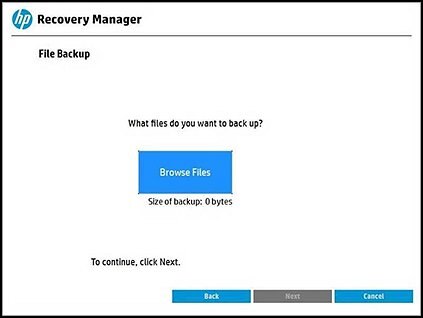
User Selection: Select Compression to make your backup file smaller, or select No compression to make no change to the size of your backup file, and then click Next.

Click Browse Files to choose the files to back up, and then click Next.
Select the files you want to back up, and then click OK.

-
-
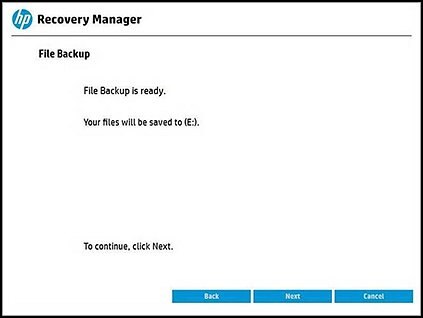
Recovery Manager scans the computer for storage devices. Select the storage device to save the backup, and then click Next.

-
Depending on the media selected to store the backup files, the computer prompts you to insert a blank disc or a USB flash drive. Insert the media into the computer, and then click Next.
-
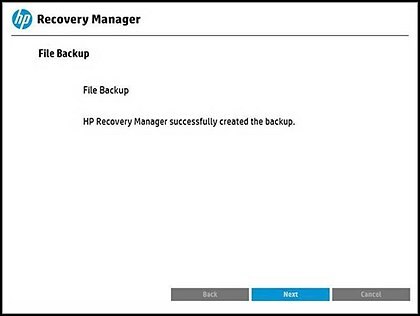
Recovery Manager displays the progress in backing up and burning the files to the backup media.

-
When Recovery Manager is finished backing up files, remove the backup disc or storage device, and then click Next to continue the recovery process.
-
-
-
The Welcome to HP Recovery Manager screen is displayed. Read the on-screen information, and then disconnect any connected devices and cables, such as Personal Media Drives, USB drives, printers, and faxes.
-
Remove media from internal drives, and remove any recently added internal hardware.
Do not disconnect the monitor, keyboard, mouse, or power cord.
-
Click Next to continue.
HP Recovery Manager prepares the computer for recovery.
note:
This process can take as long as 30 to 45 minutes. Do not interrupt HP Recovery Manager during the recovery process.
-
When recovery preparation is complete, click Continue to proceed to the installation phase of the recovery process. The computer restarts several times during the recovery. This is normal. Do not close, shut down, or disconnect the computer while HP Recovery runs.
-
Recovery Manager reformats the Windows partition and reinstalls the original software.
-
After the system recovery is complete, click Finish to restart the computer. Complete the setup screens and wait until the computer finishes the setup.
-
Once the setup is complete, turn off the computer, reconnect all devices and cables, and then turn on the computer.
-
Before using the computer, update and protect your computer by reinstalling any virus and security software that was installed before the system recovery.
-
Reinstall any software programs that were added after purchasing the computer, as well as any files that were backed up.
Things you should do after performing a recovery
How To Create Hp Recovery Partition Windows 10
Source: https://support.hp.com/us-en/document/c04758961
Posted by: grossgook1951.blogspot.com
0 Response to "How To Create Hp Recovery Partition Windows 10"
Post a Comment